 Last week I posted the roughs for this scene from The Last Viking Returns. This post will show how I got from my almost-final rough to my final illustration.
The almost-final rough looked like this:

almost-final rough
My next step: print the rough at 100% final print size and do what I call the ‘gestural rough’. This is a more complex rough where I nut out the fine details of facial expressions, body language, page bleed, etc. I also scan this in and plan out how the page border will work, and whether I can fit in all the runes needed to make the phrase legible.
(I really like the line quality in these final roughs; I’ll have to try using this style in a book one day).

‘gestural’ rough (the final rough)
Then I trace the gestural rough with a HB lead pencil. This is the final clean linework, ready to be scanned and coloured digitally.

final pencil linework
I used digital watercolour in Corel Painter for the Viking books. I started by adding the shadows with a brown or purple/grey colour, just as in a normal watercolour painting.
This step allows you to determine the light source in the scene. All colours are laid over this shadow layer, which gives all the shadows a consistent base colour value.

shadows added
I used a photograph of pebbles to provide a dragon scale texture. (I’ll talk about this more in a future post).
I used the digital watercolour brushes in Corel Painter to colour the dragon and Odin.
I also added in the border which I had pre-prepared in the earlier rough stage, using the same texture from The Last Viking.

dragon texture and colour added; border texture and colour added; Odin colour added
I added the background cloud and character colours in Photoshop …

cloud and background character colour added
… then the distant background colours. I also added a parchment texture to the scroll and applied a burnt look using Photoshop’s Burn Tool.

distant background colours added; parchment added and burnt
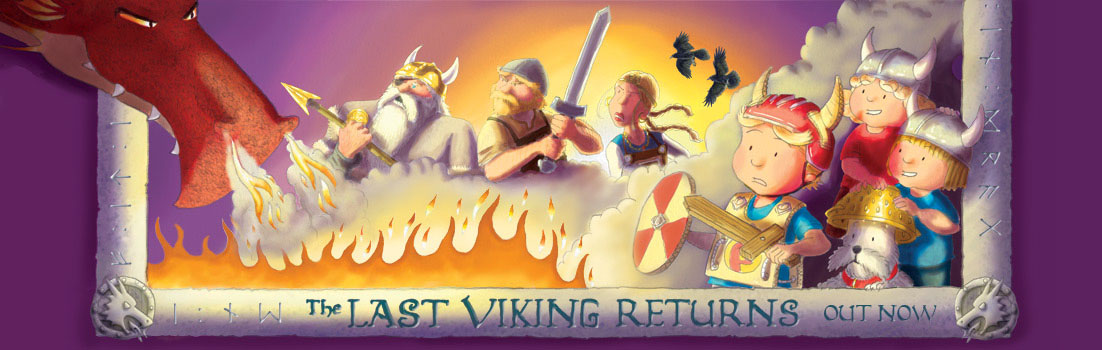
My final step was to add warm highlighting. The light source is off-page to the right; it’s the setting sun, so it needs to be casting a warm glow over everything. This gives Fafnir a dramatic rim-light.
I also added shadows and highlights to the borders to help sell the illusion that they’re an actual part of the scene.
warm highlights added; levels and saturation adjusted in Photoshop
And there you have it – the final illustration. I was really happy with the way this one turned out; it’s a bit different to how I originally imagined it but it has the feel I wanted.
Thanks for reading!

February 9, 2015 at 1:58 pm
I thoroughly enjoy walk throughs of people creating their art ☺ Thanks
February 9, 2015 at 5:33 pm
No problems Greg, glad you enjoyed it. And thanks for leaving a comment 🙂