I made some kid-size Viking costumes for my talk at the Perth Writers’ Festival. Here’s how.
This is a long post but you can click on the links below to go straight to that section.
NB – some of these elements are inspired by the great ideas at I Am Momma Hear Me Roar and Relentlessly Fun, Deceptively Educational – check them out.
Materials
Here’s the list:
- plain kitchen apron
- secondhand belts from an op-shop
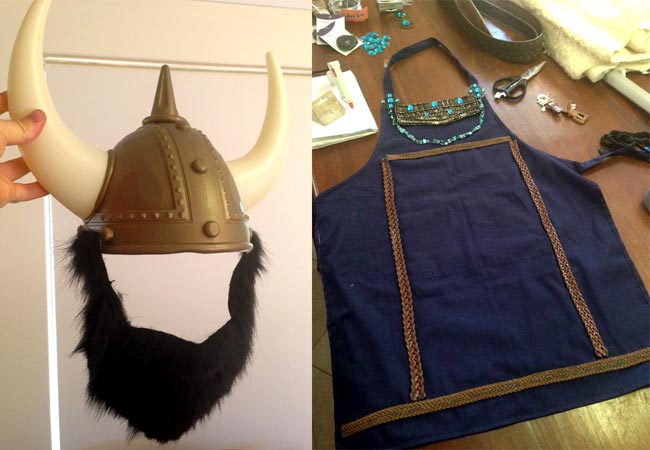
- plastic Viking helmet
- length of decent fake fur (I bought 1.5m x 250mm – I could have done with a bit more)
- alternatively you could find a wool mattress protector, or cheap toilet seat covers
- two small packs of artificial fur (in the colour you want your Viking beard to be)
- foam swords
- thick card, A2 size minimum
- bead thread
- beads
- stick-on gems
- suede leather string
- costume jewellery bits – oval shapes were used in Viking fashion
- hot glue gun & spare glue sticks
- velcro strips
- thin elastic cord
- duct tape


Boy’s costume
Let’s start with the beard. I found these packs of artificial fur at the $2 shop.

First I cut out a beard template. (I tried a few shapes until I got one that fit on my face properly.) Pin this to the fur.
TIP: Use a scalpel or stanley trimmer to cut the fur from the back. If you use scissors you will end up cutting the hair fibers and making a bigger mess.

Unfortunately my fur was the wrong shape and I couldn’t cut out the whole beard in one go. So I cut the sideburns separately and sewed them onto the beard. 
Next I glued hooked velcro squares to the tops of the sideburns.
TIP: use the hot glue gun to attach the velcro strips; even though they come with sticky backing, it isn’t sticky enough.

Then I glued looped velcro squares to the sides of the helmet.

BINGO. Instant Viking face.

Alternative: stitch a length of elastic to the tops of the sideburns. 
Classy.
Now let’s do the shoulder covering. I bought a length of fake fur from Spotlight.

I cut the fur into 5 parts; one long strip to make the shoulder covering, and 4 smaller parts to make the boot toppers.

I wrapped the long piece of fur around my shoulders. I made a few holes in the two connecting corners, then threaded some leather string through. 
Pair it with a sword, shield and belt and you’ve got yourself a Viking.
In the absence of a child willing to model the costume, here is a picture of me looking ridiculous.
(Scroll down for how to make the sword and shield)

Girl’s costume
I started with a plain navy-blue apron. I picked it up new at Spotlight but you could probably find them cheaper at an op shop.

I found these oval pieces at Spotlight, part of a ‘steampunk’ line of accessories. I hot-glued some of the fake gems on …

… then glued them onto the top corners of the apron. (Viking ladies used to have brooches here to keep their aprons up).

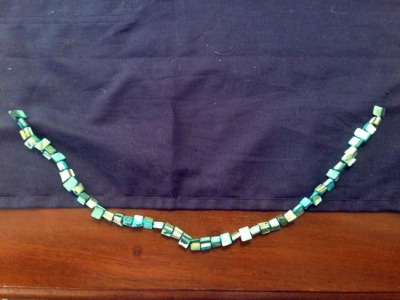
I picked up some beads designed to look like pieces of shell. I threaded them all together.

I found this belt at an op-shop. I cut off the black pleather bits and glued the middle part to the top of the apron.

I glued a few gems on there as well, and tied the beads from one brooch to the other.

Next step: I cut the buckles of these two braided belts I found. I cut them into lengths that would form some decorations down the front of the apron.

I hot-glued these on …

And it’s done.

Without a child to model this, here’s a pic of my gf wearing it:

Swords
Most $2 shops sell ‘pirate swords’ that look like this. They’re super cheap with a foam blade. Unfortunately, Vikings didn’t have swords in this style. So we need to cut the handle.

It’s foam so it cuts really easily.

Simple. 
I tried sticking duct tape to hilt of one of the swords. It worked ok but didn’t stick that well; silver electrical tape might have been better.
I tried using alfoil on the other sword (the one with the yellow handle in the above photo). The alfoil stayed on for a bit, but it tends to fall off after a while.
I covered up the yellow with bits of the black braided belt to make a more authentic-looking grip.

back to top
Shield
First step – I sketched a circle on some thick A2 or A1 card.
I also sketched a smaller circle in the centre, big enough so that a child could fit their fist in it.

Then I cut it out.

Next step – I cut the centre out of the shield. Then I cut some strips of card, and curved them with some small tabs on the ends. They fit through the centre hole.

I used duct tape to secure them to the back of the shield.

The front of the shield should look like this.

I stuck strips of duct tape to the curved strips to give them a metallic look.

I added an extra two curved strips underneath the first two.

Back view of the shield. That’s a lot of duct tape. I’ve also added a handle.


Lastly I added strips of duct tape to the front of the shield in a cross pattern, as well as strips around the edge.

Then I drew a bunch of small circles with a sharpie; once they’re done they look a little like rivets.

Shield is done!

back to top
Shin warmers
Remember those four extra sections of fake fur I cut earlier?
I glued 3 pairs of velcro strips to opposite ends of each piece. That way they can be wrapped around the shin over the top of your boots.

You can wear them over any shoes but they look best over ugg boots.

back to top

March 4, 2015 at 8:29 am
Great ideas, James. Mums all over the state will love this blog close to Book Week when it’s time to make costumes for their kids. They look brilliant and your step by step instructions are easy to follow. Have a great time in Bologna and beyond.